Installation guide and Rattan notes
article rattanPosted by admin on 2025-05-06 08:12:11 | Last Updated by admin on 2026-07-25 12:00:56
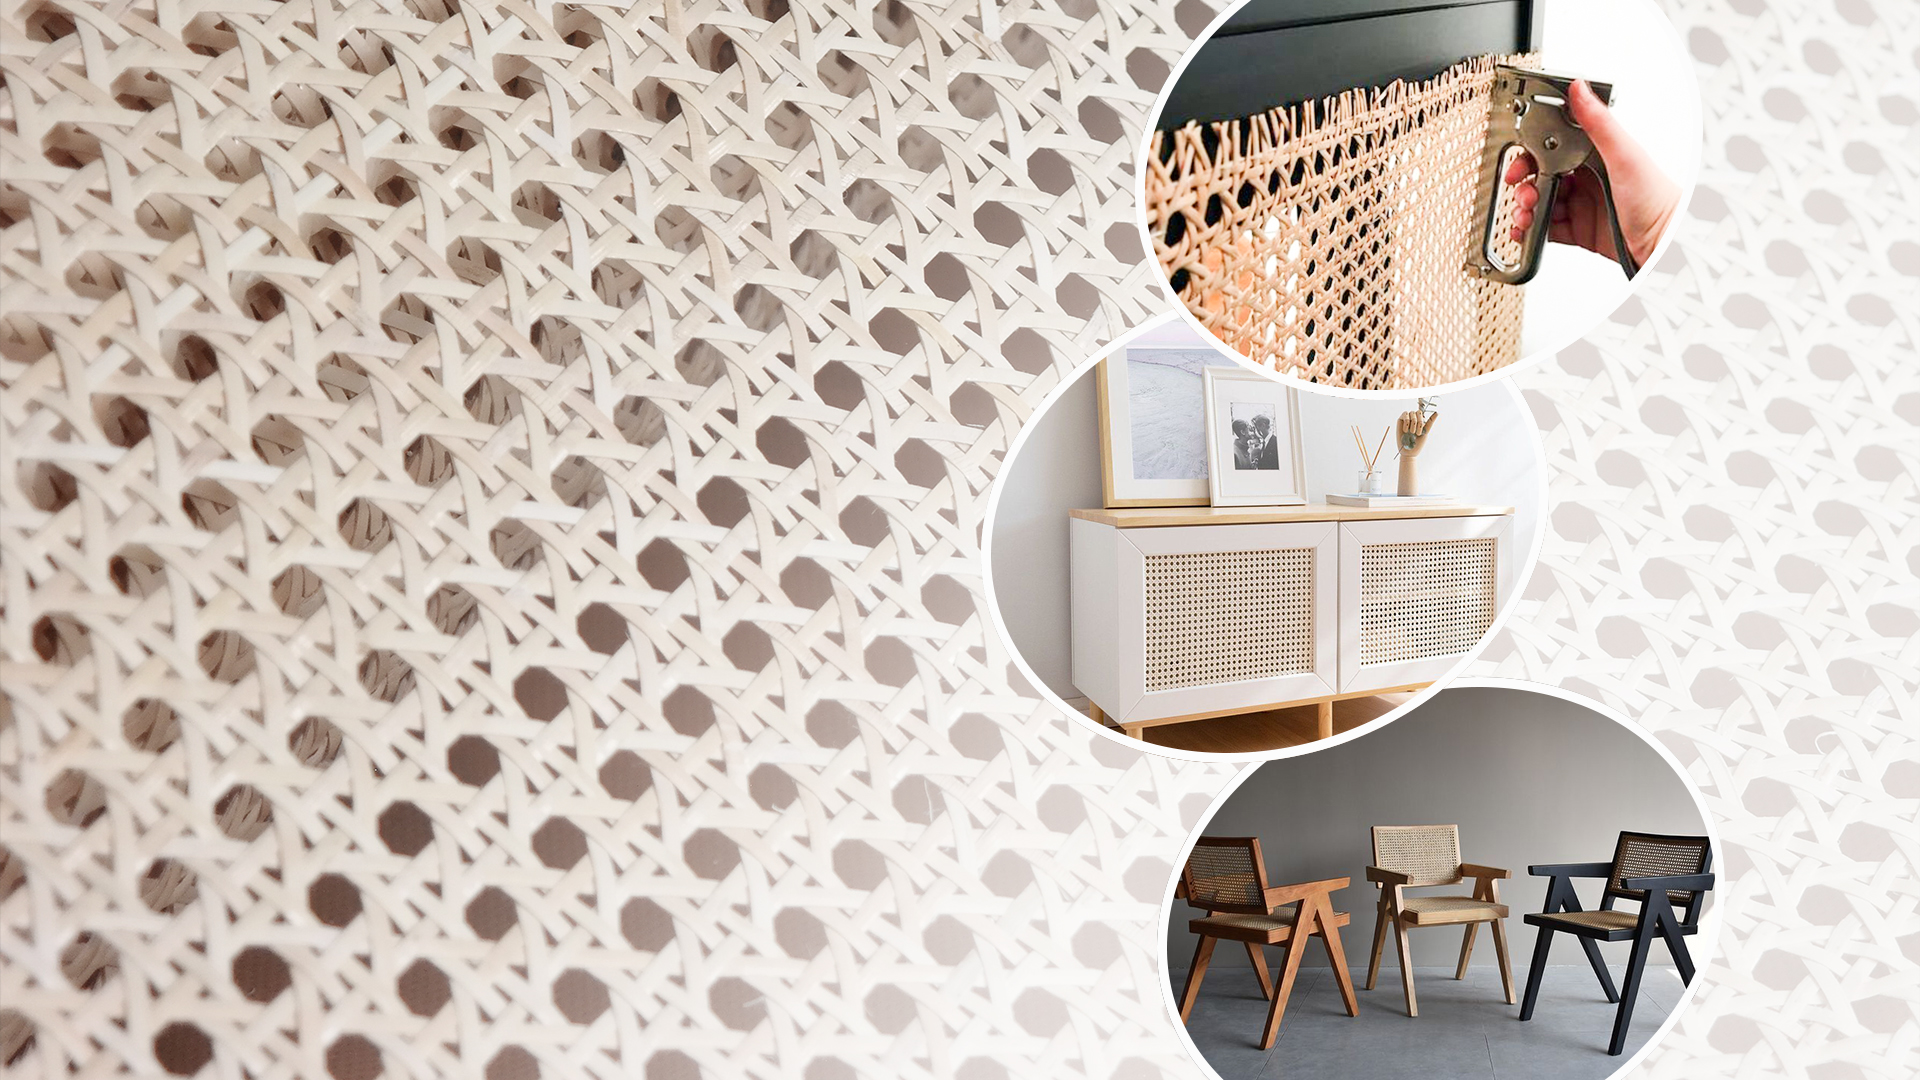
Installation guide
1. Make sure the width and length of the rattan are appropriate
for your project.
2. Put the rattan in water and soak for a maximum of 3
minutes (If using the same container for several parts, change
the water for each soaking with new clean
water)
3. Take out the rattan, dry it, then staple it to the frame.
Pull the material before stapling. Ideally the frame should have a grooved section where the material is placed and
secured with beads. We recommend using glue to
bond the ends of the rattan to the
wood. The glue should be applied close to each other to ensure the necessary
tension.
Rattan notes
- Rattan
will shrink as it dries and tightens. The frame must be sturdy and strong
to withstand the rattan shrinkage.
- Humidity
and rain can cause the rattan to become loose and slightly puffy.
- The rattan will eventually dry and tighten. If the rattan weave is still loose and looks stretched, spray it with water and let it dry naturally. The rattan will tighten again.
- Use a damp cloth to clean it, and you can apply a little Linseed Oil which will nourish the rattan.
Lets get creative with our rattan webbing products. Find the best quality that lasts to realize your ideas. With us, your creativity is limitless.
Search
Recent News
- What is Rattan Cane Webbing?
- How long does Rattan Cane Webbing Furniture last?
- Rattan webbing furniture for outdoor use
- Choosing Between Grade A or B in Rattan Webbing
- How to clean rattan webbing furniture
- Open Rattan Webbing: Tren Anyaman Rotan untuk Furnitur dan Dekorasi Interior
- Jenis-Jenis Anyaman Rotan dalam Desain Furnitur
- Types of Rattan Weaves in Furniture Design